How to Choose the Right Lighting Busbar?
Choosing the right Lighting Busbar begins with the building, not the product brochure. A retail aisle, factory line, and office ceiling demand different electrical and lighting strategies. The correct system must match load capacity, circuit length, mounting conditions, and future changes. A sleek profile cannot compensate for poor planning.
Dr. Peter Boyce, a respected lighting researcher and author of Human Factors in Lighting, offered a useful principle: “Lighting must serve the people who use the space.” That idea applies directly to Lighting Busbar selection. Check the required wattage, conductor size, voltage drop, protective devices, and connector spacing. Examine the installation environment too. Dust, heat, moisture, and vibration can shorten service life. Confirm compliance with applicable IEC, UL, or local electrical requirements. Product certification matters.
Walk through the actual space. Measure ceiling height. Mark access points. Imagine a technician replacing one spotlight at 7 a.m. Good busbar design should make that task quick and safe. It should also support clean illumination without harsh shadows or dark gaps. Track compatibility deserves attention. Not every adapter fits every rail. Small errors matter.
I have seen projects choose a lower price and later pay for rewiring, extra labor, or limited flexibility. That decision may look efficient on paper. It often is not. Still, no selection guide can predict every site condition. Verify assumptions with a qualified electrical professional, especially for high-load or emergency-lighting applications. The best Lighting Busbar is not merely bright, neat, or affordable. It is suitable, maintainable, and dependable in daily use.
Define the Lighting Busbar System and Its Main Components
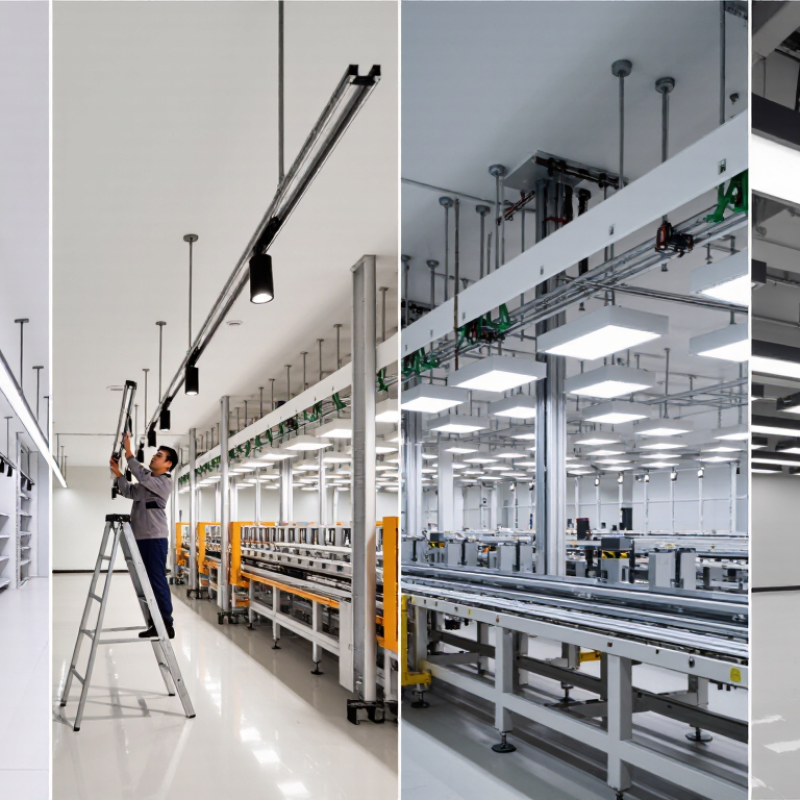
A lighting busbar system is a modular electrical distribution system for lighting fixtures. It carries power through a compact, enclosed track instead of separate cables for every luminaire. This arrangement can simplify installation, relocation, and maintenance in retail spaces, offices, workshops, and public interiors.
The main component is the busbar trunking, which contains insulated conductors inside a protective housing. Plug-in tap-off units connect fixtures to these conductors at selected points. Adaptors, suspension kits, end caps, joint covers, and power-feed units complete the assembly. Each part has a specific role. A loose joint can affect safety and performance.
In practical installations, the track length, current rating, conductor arrangement, and ingress protection should match the environment. A dusty workshop needs different protection from a clean office ceiling. The lighting load must also stay within the system’s rated capacity. It is not decorative.
Installers should check conductor polarity, earthing continuity, mechanical support, and connector engagement before energizing the system. A qualified professional should verify the design against local electrical requirements. I have found that layout drawings often look simple, yet access points can become awkward after ceiling services are installed. That detail deserves more attention. A busbar may be technically suitable but poorly positioned, creating glare, maintenance delays, or unnecessary fixture movement. Safety tests and manufacturer-neutral technical documentation help confirm whether the selected system truly fits the project.
Assess Electrical Load, Circuit Capacity, and Power Distribution Needs
How to Choose the Right Lighting Busbar?
Selecting a lighting busbar starts with the real electrical load, not the fixture count alone. Record each luminaire’s wattage, driver type, starting current, and operating voltage. LED drivers can create brief inrush currents that ordinary load estimates may miss. Measure where possible. Do not rely only on catalog figures.
Compare the calculated demand with the busbar’s rated current and each circuit’s protective device. Leave practical capacity for future fittings, maintenance changes, and uneven circuit loading. A 16-ampere circuit may not provide 16 amperes continuously under every installation condition. Check conductor size, ambient temperature, installation method, and allowable voltage drop. Local electrical codes and qualified inspection should guide the final decision.
Power distribution also affects performance. Long runs can produce visible dimming at the far end, especially in large retail spaces or warehouses. Divide the lighting into balanced circuits, emergency sections, and separately controlled zones when needed. Use suitable tap-off points with secure connections and clear circuit identification. Small details matter.
I have seen projects fail because the designer counted fixtures but ignored control equipment. That shortcut looked efficient, yet it caused nuisance tripping during commissioning. Recheck the assumptions. A slightly larger capacity may cost more initially, but replacing an overloaded system costs far more.
Compare Busbar Types, Materials, Mounting Methods, and Compatibility
How to Choose the Right Lighting Busbar?
Choosing a lighting busbar involves more than matching its length to the ceiling. Single-circuit systems work well for simple switching. Multi-circuit systems provide separate control for task, accent, and ambient lighting. DALI-compatible versions support digital dimming when the control system and luminaires share the same protocol. Keep it simple. Extra functions can increase cost and installation time.
Material affects more than weight. Copper offers strong conductivity and stable connections. Aluminum can reduce weight, but connection points need careful inspection. Steel housings can improve mechanical protection, while insulated polymer sections may simplify handling. Surface-mounted busbars suit exposed ceilings and easier maintenance. Recessed models create a cleaner appearance but require accurate ceiling preparation. Suspended systems can guide lighting over worktables and open spaces.
Compatibility deserves the closest check. Confirm rated voltage, current capacity, phase arrangement, earthing, connector geometry, and control protocol. An adapter may fit physically yet fail electrically. Check the luminaire load, not just the number of fixtures. Allow room for future additions. Local electrical rules should guide final installation, with testing completed by a qualified professional. I would not rely on photographs alone. Measure twice. In practice, product descriptions can omit small connector differences, and that detail may stop an otherwise suitable system from working.
How to Choose the Right Lighting Busbar?
Compare busbar types, conductor materials, mounting methods, and compatibility before selecting a lighting track system.
The chart uses a typical 1–5 engineering comparison scale. Higher values indicate greater suitability for the listed selection factor, while actual performance depends on the system design, rated current, installation environment, and applicable electrical requirements.
- 1-circuit systems: Suitable for simple installations with one independently controlled lighting group.
- 2- and 3-circuit systems: Provide multiple switching zones and are commonly selected for retail, hospitality, and commercial spaces.
- Copper conductors: Offer approximately 100% IACS electrical conductivity, while aluminum is approximately 61% IACS and generally provides lower weight.
- Surface mounting: Simplifies installation and maintenance; recessed mounting provides better architectural integration but requires suitable ceiling coordination.
- Compatibility: Track adapters must match the busbar geometry, circuit configuration, polarity, mechanical profile, and electrical rating. IEC 60570 is a relevant standard for electrical supply track systems.
Check Safety Standards, Installation Conditions, and Maintenance Requirements
Choosing the right lighting busbar starts with safety, not appearance. Check the electrical standards required in your installation region. Confirm ratings for voltage, current, temperature, insulation, and short-circuit resistance. Ask for test reports from recognized laboratories. Do not rely on a sales sheet alone. Verify conductor spacing and protective earthing details. A small gap matters. In a dusty workshop, heat and contamination can reduce safe performance. The selected busbar should match the fittings, connectors, and protective devices used on site.
Installation conditions deserve a careful walk-through before ordering.
Measure ceiling height, support spacing, access routes, and expected cable bends. Check whether the track will face moisture, vibration, cleaning chemicals, or frequent impact. Use an enclosure rating suitable for the actual environment, not the ideal drawing. Inspect joints after tightening. Loose connections may create hot spots, flickering, or insulation damage. Keep thermal expansion in mind across long runs. Installers sometimes focus on straight alignment and overlook service access. That mistake becomes expensive when one connector needs replacement.
Maintenance requirements should be agreed with the building operator. Can technicians isolate one section safely? Are replacement modules available? Is each connection clearly labeled? A practical schedule may include visual checks, torque verification, dust removal, and thermal inspection. Record findings with dates and photographs. Do not assume a clean room stays clean. Conditions change after production begins. A checklist improves consistency, but it can still miss unusual vibration or repeated overload. Review the design after the first operating month. That feedback may reveal better spacing, support, or inspection intervals. Leave room for correction.
Select the Best Lighting Busbar for Your Budget and Future Expansion
Choosing a lighting busbar is not only about the lowest purchase price. A cheaper rail may require extra adapters, stronger supports, or earlier replacement. Start with the lighting load, circuit length, ceiling height, and planned fixture positions. In real installations, small layout changes often create unexpected costs. Measure twice. Buy once, if possible. Ask a qualified electrician to verify current rating, voltage compatibility, conductor size, and protective devices. These details affect safety and reliability more than appearance.
For a limited budget, choose a modular system with common connection points and replaceable components. It may cost slightly more today, but it can reduce labor when fixtures move. Leave spare capacity for future lights, emergency fittings, or a changed room layout. Do not operate the busbar at its rated limit. Heat, grouping, and continuous use can reduce practical capacity. Check installation instructions and local electrical requirements before ordering. I have seen projects save money on the rail, then spend more on custom parts. That lesson is easy to ignore.
Tips: Compare total installed cost, not the rail alone. Request a clear load schedule and expansion plan. Confirm spare capacity in both electrical rating and physical length. Keep connectors accessible for maintenance. If expansion seems likely, reserve a modest budget for extra modules. A little planning helps. Forecasts can be wrong, so avoid buying more than the space and design can realistically use.
How to Choose the Right Lighting Busbar? - Select the Best Lighting Busbar for Your Budget and Future Expansion
| Lighting Busbar Type |
Typical Rated Current |
Typical Voltage |
Typical Protection Rating |
Standard Length Options |
Expansion Capability |
Installation Complexity |
Indicative Material Cost* |
Best Suited For |
| Compact 1-Circuit Lighting Busbar |
16–25 A |
230 V single-phase |
IP20–IP40 for indoor use |
1 m, 2 m, 3 m |
Basic; additional sections and tap-off points can be added with compatible joints |
Low |
Low |
Small retail spaces, corridors, offices and straightforward lighting layouts |
| Standard 2-Circuit Lighting Busbar |
16–25 A per circuit |
230 V single-phase |
IP20–IP40 for indoor use |
1 m, 2 m, 3 m |
Good; supports separate switching of general and accent lighting |
Low to medium |
Low to medium |
Shops, galleries, restaurants and spaces requiring flexible scene control |
| Multi-Circuit Track Busbar |
16–32 A per circuit |
230 V single-phase |
IP20–IP40 for indoor use |
1 m, 2 m, 3 m and custom cut lengths |
Very good; multiple circuits allow future fixture relocation and zoning |
Medium |
Medium |
Retail floors, showrooms and commercial interiors with changing layouts |
| High-Capacity Lighting Busbar |
40–63 A |
230/400 V, subject to system configuration |
IP40–IP55 depending on enclosure design |
1 m, 2 m, 3 m and longer project sections |
Excellent; suitable for larger distribution zones and higher future loads |
Medium to high |
Medium to high |
Large commercial areas, warehouses, public buildings and high-density lighting systems |
| Industrial Enclosed Busbar System |
63–160 A for lighting and auxiliary distribution |
230/400 V three-phase |
IP54–IP65 for demanding environments |
1.5 m, 3 m and project-specific sections |
Excellent; supports frequent tap-offs, long routes and future branch circuits |
High |
High |
Factories, logistics facilities, workshops and areas exposed to dust or moisture |
*Indicative material cost is a relative comparison only and excludes luminaires, power supplies, installation labor, transport, protective devices and project-specific accessories. Confirm the final current rating, voltage, IP rating, conductor configuration, fire requirements and local electrical-code compliance before selection.